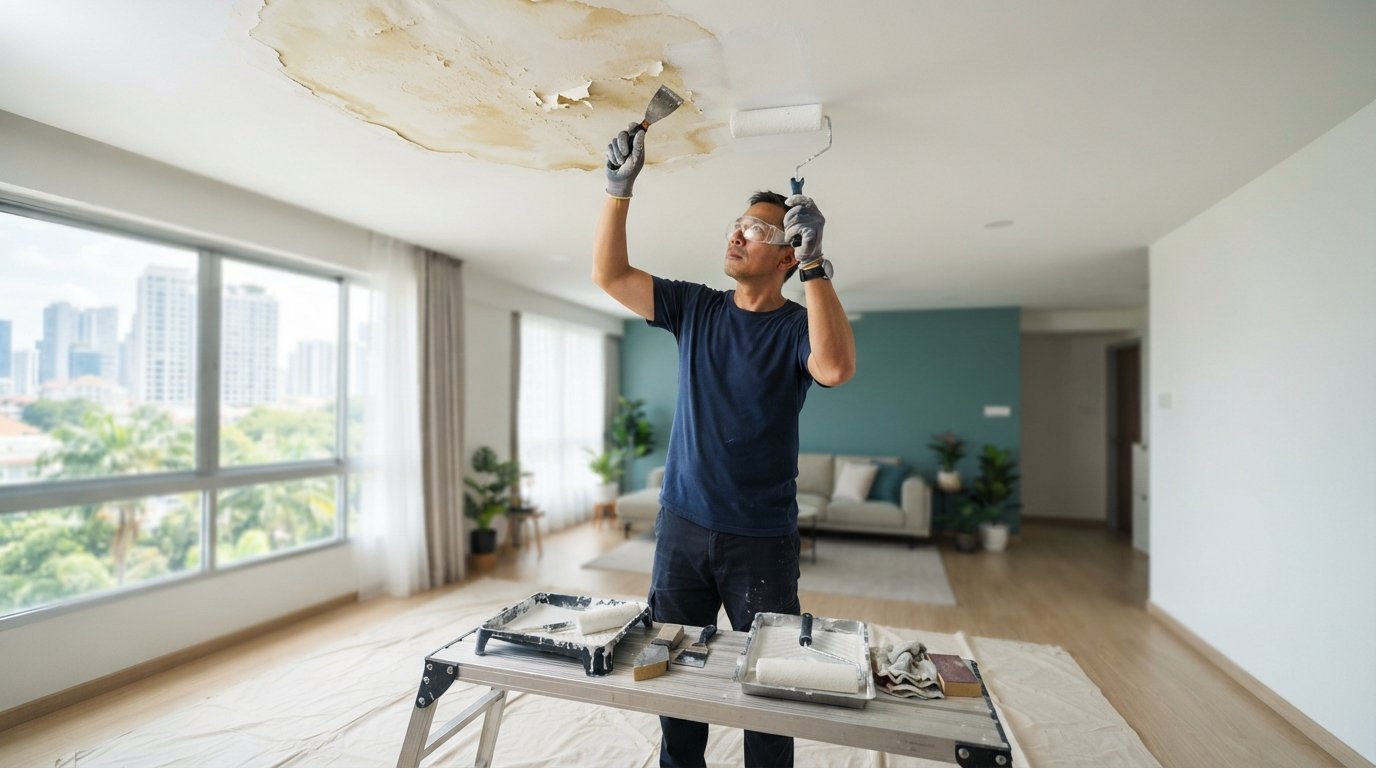
Slapping three thick coats of standard ceiling paint over a watermark won’t hide the damage; it actually draws the stain straight back to the surface. Standard water-based emulsion dissolves dried mineral salts and tannins, pulling an ugly yellowish halo through every fresh coat you apply. We know how frustrating it is to watch peeling edges and stubborn rings bleed right through your hard work. Genuine, long-lasting restoration requires chemical isolation rather than heavier paint layers, which makes sealing water stains on ceiling before painting the single most critical step in your repair.
In this guide, you will master the proven method to permanently block bleed-through, diagnose underlying moisture, and restore a flawless matte plane across your ceiling. We will walk you through essential surface preparation, barrier primer selection, and clear indicators of when a cosmetic fix is safe versus when spalling concrete needs structural attention.
Key Takeaways
- Master the chemical isolation process behind sealing water stains on ceiling before painting so dried salts and tannins never re-dissolve into your topcoat.
- Compare solvent-borne alkyd and pigmented shellac sealers to choose the right moisture-resistant barrier for your ceiling type.
- Follow professional prep steps to clear loose efflorescence, skim imperfections smooth, and achieve a flawless, streak-free matte finish.
- Identify critical warning signs of active inter-floor leaks and structural concrete spalling that require professional repair rather than cosmetic touch-ups.
Diagnosing Ceiling Stains: Why Emulsion Alone Fails to Stop Bleed-Through
When water penetrates ceiling boards or concrete slabs, it evaporates and leaves behind concentrated mineral salts, tannins, and rust deposits. Applying standard latex emulsion directly over these patches fails every time. Emulsion is water-based, meaning it re-dissolves those dried crystalline compounds on contact. As the paint cures, capillary action pulls the reactivated tannins straight up into your topcoat. Piling on extra emulsion layers simply builds thickness without creating an impermeable barrier. Successfully sealing water stains on ceiling before painting demands complete chemical isolation using a dedicated, non-water-soluble primer.
Confirming the Substrate Is Thoroughly Dry Before Coating
Never seal an active leak. Trapping latent moisture behind impermeable barrier coats causes bubbling, blistering, and rapid paint failure. In local HDB flats and private apartments, upper-floor bathroom waterproofing failures or concealed air-conditioning drainage leaks are common culprits. Inspect surrounding pipe collars and upstairs wet areas first. Test the ceiling using a non-invasive moisture meter to confirm it has thoroughly dried. Safe drywall readings must sit below 1% on a gypsum scale, or between 5% and 12% on a comparative scale. Any reading reaching 16% or higher indicates trapped dampness that will destroy your finish.
Checking for Structural Plaster Damage and Delamination
Prolonged moisture compromises the binder within ceiling materials. Before sealing water stains on ceiling before painting, press your fingers firmly around the discoloured perimeter to check for spongy gypsum or crumbly skim plaster. On concrete ceilings, tap the stained area lightly with the butt of a putty knife. A hollow, drummy tone signals debonded plaster screed. Scrape away all detached material, patch the void with a compatible filler, and sand the plane flat before applying your primer.
Selecting the Best Stain-Blocking Primer: Oil, Shellac, or Water-Based
Permanent restoration hinges entirely on resin chemistry. Stain-blocking primers work because their specialized binders cure into non-porous films that physically lock out dissolved contaminants. When sealing water stains on ceiling before painting, matching the correct solvent base to your stain severity guarantees you won’t face bleed-through months later.
Oil-Based Alkyd Primers vs. Shellac Sealers
Oil-based alkyds penetrate chalky substrates deeply, anchoring securely to aged plasterboard and cured concrete. They form a resilient shield against heavy mineral salt migration. Pigmented shellac sealers offer even faster isolation. Shellac dries to the touch in just 15 to 45 minutes, encapsulating stubborn rust rings, soot, and dark wood tannins beneath an impervious natural resin barrier. Keep room windows wide open and run industrial floor fans, as both solvent types release noticeable fumes during application. If you prefer to skip strong solvents entirely, engaging expert condo painting services ensures fast application using specialised technical equipment without lingering odours.
When Advanced Water-Based Stain Blockers Are Appropriate
Water-borne stain blockers have improved, but they have distinct limits. Reserve high-grade acrylic stain blockers exclusively for faint, thoroughly dry discoloration in low-humidity zones. Their near-zero VOC profile makes them pleasant for occupied bedrooms and children’s nurseries. However, you must confirm the product label explicitly states “water stain barrier” rather than general drywall priming. Severe dark pooling or rusty watermarks will simply dissolve into acrylic formulations, rendering them ineffective for deep water damage.
Choosing the right primer creates the chemical foundation your ceiling needs. Once cured, it accepts any quality flat acrylic or vinyl ceiling finish seamlessly, providing a clean surface that holds up over time.

Step-by-Step Guide: How to Seal and Repaint a Water-Stained Ceiling
Protecting your interior comes first. Lay heavy canvas drop sheets across the floor and secure adjacent walls using low-tack painter tape. Ceiling work creates fine, falling dust that embeds easily into unprotected flooring, so taking ten minutes to cover furniture saves hours of cleanup later.
Surface Preparation, Cleaning, and Scraping
Scrape loose, bubbled paint and crumbling plaster down to a stable base with a flexible putty knife. Wash the stained patch with a mild detergent solution to lift greasy kitchen films, soot, and crystallized efflorescence. Allow the zone to dry completely. If scraping leaves depressions, skim the low spots level and feather the borders flush. For damaged concrete or uneven boards, review The Ultimate Guide to Wall Plastering and Skim Coating in Singapore (2026) to master compound application.
Sealer Application and Topcoat Blending Technique
When sealing water stains on ceiling before painting, apply your stain-blocking primer at least 150mm beyond the outer halo. Feather your roller pressure outward toward the dry perimeter. This eliminates hard buildup ridges that show under raking light. Let the primer cure according to technical specifications, typically 45 minutes for shellac or overnight for traditional alkyds.
Never spot-paint just the primed patch with ceiling paint. Spot-painting creates flashing circles that stand out under ambient room lighting. Instead, roll two uniform coats of flat ceiling emulsion across the entire ceiling plane from corner to corner. If managing high ceilings or extensive moisture patches feels daunting, arrange our dedicated HDB painting services to secure a clean, uniform finish across your property.
When DIY Sealing Isn’t Enough: Recognizing Concrete Spalling and Structural Leaks
Not every ceiling mark yields to standard primer. Persistent dampness or bulging plaster often points to unresolved inter-floor pipe seepage or exterior facade penetration. Applying cosmetic coatings over trapped dampness accelerates internal decay. In reinforced masonry, successful sealing water stains on ceiling before painting requires resolving the moisture source and restoring the structural base first.
Identifying Spalling Concrete Behind Peeling Ceiling Finishes
Look beneath loose paint for telltale reddish rust streaks, expanding cracks, or detached cement chunks. When moisture reaches embedded steel reinforcement in concrete slabs, the steel corrodes and expands up to six times its volume. This expansion generates intense internal pressure, causing concrete delamination known as spalling. Simply painting over this deterioration hides a growing safety hazard. Review key repair procedures in the Complete Guide to HDB Painting Services Singapore: 2026 Edition to understand how corroded rebar must be treated before applying finishes.
Why Homeowners Choose Professional Painting Restoration
Overhead scraping, skim coating, and rolling high ceilings requires continuous physical exertion and introduces significant ladder hazards. Engaging professional contractors ensures your ceiling receives accurate moisture assessment, structural spalling repair, and seamless blending across broad ceiling planes without lap marks. Dedicated crews handle messy dust extraction, protective floor coverings, and final application efficiently. For complete restoration insights, explore Professional House Painting Services in Singapore: The 2026 Homeowner’s Guide.
Restore Flawless Ceiling Beauty With Lasting Confidence
Eliminating persistent watermarks comes down to accurate diagnosis and proper barrier chemistry. Trapping moisture under quick cosmetic coats invites recurring peeling, while sealing water stains on ceiling before painting with specialized alkyd or shellac primers locks out stubborn mineral salts permanently. You don’t have to settle for uneven patches or lingering yellow haloes. Taking the time to verify dry substrates, feather primer edges, and recoat the full ceiling plane guarantees a seamless, shadow-free overhead finish.
When discolouration reveals structural concerns like spalling concrete or complex plaster repair, professional hands ensure lasting peace of mind. Backed by over 10 years of surface preparation experience across Singapore homes, our skilled team handles every stage with precision, from technical spalling repair and skimming to meticulous furniture masking and cleanup. Restore your ceilings with flawless professional painting services today and bring fresh, unblemished elegance back to your living spaces.
Frequently Asked Questions
Can I paint directly over a water stain on my ceiling with white emulsion?
No, you should never paint directly over a water stain with standard emulsion. Emulsion is water-based, so it instantly reactivates dried mineral salts and dissolved tannins in the plaster. Capillary action draws those discoloured compounds right into your wet coat as it cures. You will end up with an unsightly yellow halo bleeding through the fresh paint within days.
How long does a water-damaged ceiling need to dry before applying sealer?
A water-damaged ceiling typically requires 24 to 72 hours of forced ventilation once the leak stops. Never rush the process. Gypsum board or concrete plaster must register below safe moisture thresholds on a non-destructive meter before coating. Trapping residual moisture behind an oil or shellac film causes severe blistering, premature debonding, and potential mold growth behind the sealed plane.
What is the best primer to block stubborn water stains on ceilings?
Pigmented shellac and oil-based alkyd primers are the most effective options available. Shellac provides the fastest cure and absolute stain containment, creating a hard, non-porous resin film that blocks heavy soot, tannins, and dark water rings in under 45 minutes. Oil-based primers offer deeper substrate penetration on chalky plaster, ensuring a resilient foundation before applying your final ceiling emulsion.
Why does a water stain keep bleeding through multiple coats of ceiling paint?
Water stains keep bleeding through because standard emulsions lack stain-locking resins. Each new layer of water-based paint simply re-wets the water-soluble crystalline salts trapped in your ceiling substrate. The liquid carries the salts outward to the surface again during drying. Effective sealing water stains on ceiling before painting requires an oil or alcohol-based chemical barrier that water cannot dissolve or penetrate.
How do I blend the newly painted patch with the rest of the ceiling?
Feather your primer edges outward by at least 150mm beyond the watermark to prevent raised paint ridges. Once the barrier cures, apply two continuous coats of ultra-flat ceiling emulsion across the entire ceiling plane from edge to edge. Spot-painting just the treated section causes flashing under natural light, while recoating the entire surface produces an even, seamless finish.